Showing posts with label Simple Recipes. Show all posts

Tuesday, October 28, 2008

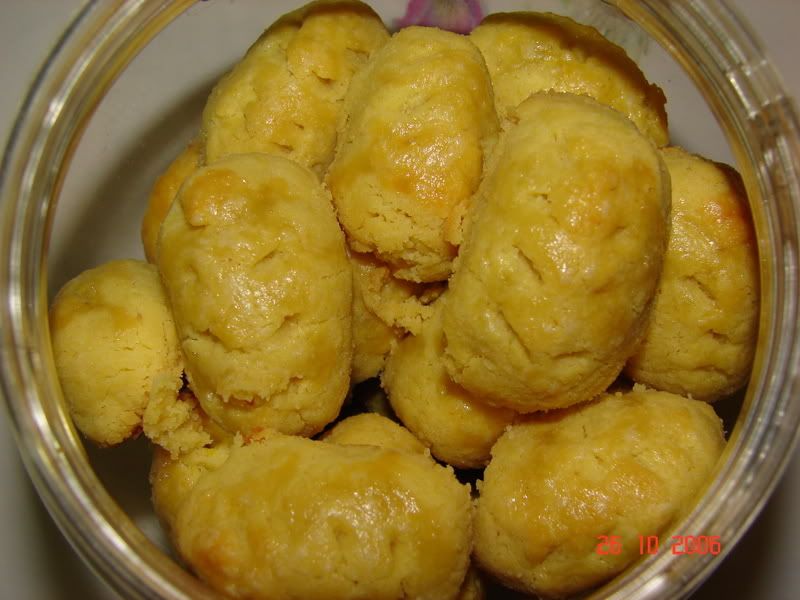
Egg Tarts.. my version

I have wanting to try the egg tarts recipe since last year but never get the chance to do it. Finally one night when my kids were already sleeping..at 10.30pm.. I decided I want to bake the egg tarts.. thought that I had all the ingredients at home but turned out there were one or two ingredients that I didn't have at that time.. but.. I decided to be adventurous ( kunun..) and try to use other things to replace them..

Here is the recipe that I used (my version of course..)

Ingredients

1 cup icing sugar
3 cups flour
1 cup butter
1 egg, beaten
1 tsp vanilla essence

Filling:

3/4 cup water
4 eggs, beaten
1 tsp vanilla essence
1 cup condensed milk

DIRECTIONS
1. In a medium bowl, mix together the icing sugar and flour. Mix in butter with a fork or fingers until it is in small crumbs.

2. Mix in the egg and vanilla until the mixture forms a dough. The texture should be slightly moist. Add more butter if it is too dry, or more flour, if the dough seems greasy.

3. Shape dough into 1 1/2 inch balls, and press the balls into tart molds ( I just used a cupcake baking tin) so that it covers the bottom, and goes up higher than the sides. Use fork to shape the edges.
4. Preheat the oven to 180C.

5. Combine the filling ingredients and strain the filling through a sieve. Fill the tart shells.

6. Bake for 15 to 20 minutes in the preheated oven, until golden brown, and the filling is puffed up a little bit.

The result... tadaaa...


No the best looking ones.. but still taste yummy hehehehe... I can save up to RM10 with this recipe... since I think the egg tarts are sold at RM1.20 each in the bakery :)

Monday, October 20, 2008

Simple Chocolate Cupcakes

Elo...elo... anybody here??? I know, I know... so long no see recipes here... so sorry been busy that I didn't have time to test try kinam some simple recipes...

My eldest's birthday was on the 13th October, I wanted to order a cake from the bakery but she insisted that I bake a chocolate cake for her and she will help to decorate. Sooo... I decided to bake a chocolate cupcakes for her to decorate and bring them to schools to share with her classmates.

The recipes..

Ingredients
125gm unsalted butter
125gm Castor sugar
125gm self-raising flour
2 tablespoons of cocoa powder
2 eggs
1 teaspoon of vanilla essence
80gm chocolate chips

Method:
1. Mix the butter and castor sugar until fluffy
2. Then add the flour and cocoa powder slowly until all done and mixed together.
3. Add in the eggs and vanilla essence and mix.
4. Mix in the chocolate chips.
5. Pour into cupcakes or muffin baking tray (lined with cupcakes cups or papers) until 2/3 full.
6. Bake at 180C for 20-25min.

CHOCOLATE ICING
Ingredients :
250g margarine
3 tablespoons cocoa powder
1 can (397g) condensed milk

Method :
1. Beat margarine with cocoa powder till well blended.
2. Gradually add the condensed milk and stir till smooth.
3. Ready to use.


Isn't it easy peasy? Here are some photoes of the cupcakes

Here's how they look like after they were out from the oven

Here's a peek of what's going on inside the cupcake

And here are the the cupcakes decorated by the birthday girl, ready to be shared with her classmates and she is sooo proud with the deco... as long as she is happy and her classmates enjoyed the cupcakes, that's all matter to me :) .

Friday, September 26, 2008

My Version of : Kueh Lapis Kacang Hijau Berkoko a.k.a Cocoa & Mung Bean Layer Cake


Easy to prepare and cook!. I have been thinking of cooking this Kuih Lapis Kacang Hijau eversince I saw the kuih lapis made by Fabmom. But I dont want to buy many kinds of flour like stated in the recipe tried by Fabmom... so by try and error.. here is my version of the kuih lapis kacang hijau. I didnt want to use any food colouring, so I am using natural colouring and flavour hehehehe.

Ingredients A:
1 cup flour
1 tbsp rice flour
1 tbsp corn flour
1/3 cup sugar
2 cups coconut white milk (santan
1/2 tsp salt

Ingredient B
1 cup mung bean, boiled to soften and blended in a blender/food processor

Ingredient C
1/2 tbsp cocoa powder, dissolve in 1/4 cup of warm water


Methods:
1. Mix all ingredients A and sieve to make sure all are mixed well and smooth batter.
2. Divide into 2 portions
3. Mix in the blended mung bean into one portion and the cocoa mixture in the other portion.
4. Heat up the steamer ( I just use a wok with cover) and grease (with bit of cooking oil) the container you are going to use for cooking the batter. I just use a grease baking tin.
5. Pour in half of portion of the cocoa batter and steam for 3 min ( depends on how thick the layer is, the thicker the layer the longer the time needed to steam).
6. Then pour in half of the mung bean batter and steam for 3 min.
7. Repeat until all batter finish up.
8. Cool and slice according to your preference.


note: easier to slice with a grease(with cooking oil) knife

Monday, September 22, 2008

Tat Nenas- Pineapple Tart


This is the old recipe I tried last year... if lab papa and the wifey can remember... I did bring some of these tarts to work and let our "food tasting gang" sampled some of it :). It is very soft and tasty pineapple tart... just ask lab papa hahahaha. You can use the recipe for your Raya cookies :).

Ingredient
250g butter
50 g icing sugar
1 egg
1 egg yolk
35g milk powder
375 g flour (this is an estimate, add as much as you needed, as long as it is easy to shape or mould)
1/2 tsp vanilla essence
1/2 tsp yellow food colouring
pineapple filling ( can be bought from supermarket or baking supplies shops)

Method:

1.Mix well butter and icing sugar.
2.Add in egg, mix well.
3. Pour in the vanilla essence and yellow colouring. Mix well
4. Add in the milk powder and half of the flour. Knead slowly. Add more flour until the dough does not stick to fingers.
5. Mould or shape according to whatever shapes you like with the pineapple filling in the middle.
6. Brush some egg yolk on the top of the cookies
7. Bake for 15min 180C.

Nice and simple but taste very nice..

Friday, September 19, 2008

Magic Peanut Butter Middles


This is a simple recipe but taste very yummy provided you like peanut butter :). But very sweet though, you might want to reduce the sugar in the filling if you do not like sweet cookies. My DD like it very much, I think because she loves peanut butter hehehehe

Ingredients
200g flour
40 g cocoa powder
½ tsp baking soda
1 tsp baking powder
100 g white sugar
110 g packed brown sugar
115 g butter,softened
65 g peanut butter (crunchy)
1 tsp vanilla extract
1 egg

filling
90 g icing sugar
195 g peanut butter (creamy)

Method:
1. Sift together flour, cocoa powder, baking soda and baking powder until well mix.
2. In bowl mixer, cream butter, peanut butter,white sugar and brown sugar until fluffy. Add vanilla essence and egg. Mix in the dry ingredients to the butter mixture.
3. For Filling: Mix peanut butter with icing sugar until well blended.
4. The cookie dough should be easy to mould with your fingers. Take 1 tbsp of the cookie dough and flatten it with your fingers. Fill in with 1 tsp of the filling and cover completely. Flatten the dough and place on baking tray ( remember to place them about 1-2cm apart )
5. Bake at 190C for 9 minutes.

Monday, September 15, 2008

Simple Fruit Cake


  • 1 cup butter
  • 2 cups golden raisins and sultanas mix
  • 2 1/2 cups sifted all-purpose flour
  • 1 teaspoon baking powder
  • 1/2 teaspoon salt
  • 1 teaspoon vanilla extract
  • 1 1/4 cups white sugar
  • 4 eggs

DIRECTIONS

  1. Preheat oven at 15oC. Wash and dry raisins and sultanas mix.
  2. Grease and line cake tin with grease paper.
  3. Sift all purpose flour and baking powder together. Add in the sugar and the salt.
  4. Beat in the eggs with the flour mixture, one egg at a time. Mix well.
  5. Beat in the butter until creamy and fluffy.
  6. Add in the dried fruits and mix well with a spoon.
  7. Turn batter into prepared cake tin, filling 2/3 full and spread batter evenly. Tap the cake tin on the work surface to pop any air bubbles.
  8. Bake 70-80mins. To test whether the cake is done, poke a skewer or a toothpick near the centre of the cake after baking for 1 hour. If it comes out clean, the cake is done.
  9. Remove from oven. Allow to stand for about 5-1omins before turning the cake out on a wire rack to cool.
Simple right? The one I baked taste a bit dry but it tastes much better after a day or two. You can add any dried fruits you like and probably with some lemon's rind.

Thursday, August 7, 2008

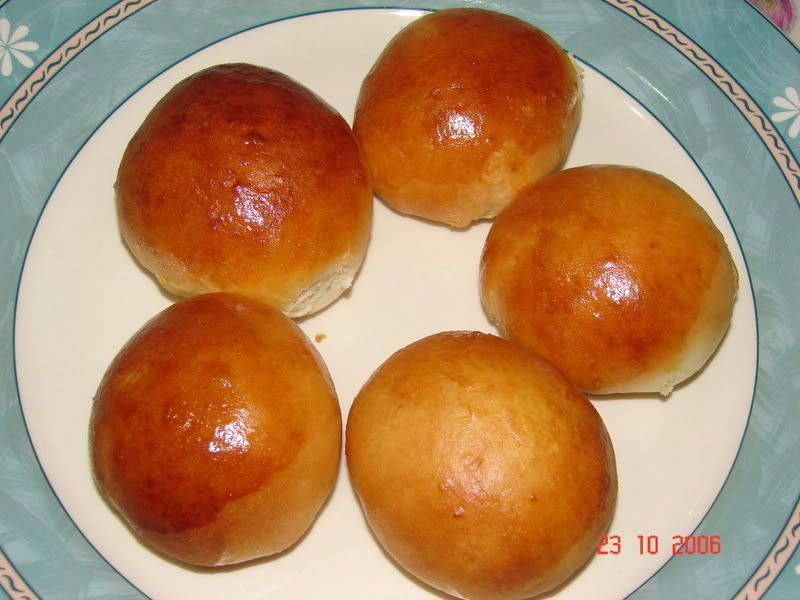
Steamed Bun


My first attempt of making Steamed Bun. The result... no bad oooh. I didnt have any other fillings and I was too lazy to make red bean (tausa) filling or any other fillings, so I just open a can of "kaya" or coconut jam and used it as the filling.
The recipe and ingredients are quite simple and easy to do actually, it just needed a long time waiting for the dough to rise.
Here is the recipe I tried:

What you'll need to make 24 buns:

Starter:
1 tbsp active dry yeast
1 tsp white sugar
1/4 cup all-purpose flour
1/4 cup warm water

Dough:
1/2 cup warm water or milk
1 1/2 cups all-purpose flour
1/4 tsp salt
2 tbsp white sugar
1 tbsp vegetable or peanut oil

Finish-up & cooking:
Steamer (I just used my wok as my steamer)
Parchment paper
Paper towel

Methods
1. In your mixing bowl, mix the water and flour from the "starter" stage, then sprinkle the yeast and sugar on top. (The water should be about 40C to make a good environment for the yeast.) Leave it for around 15-30 minutes.

2. Stir in the remaining water/milk (I used milk), flour, salt, sugar, and oil. Mix it into dough. Flour your work surface, turn the dough onto it, and knead it until it's smooth. Then grease a bowl lightly, return the doughball to the bowl, roll it around to coat the ball with grease, cover it, and let it stand for 2.5 - 3 hours or until has tripled in size.

3.Punch down the dough with the back of your fist, and then knead it for five minutes. Then put half of the dough back in the bowl and cover it again, and pull off bits of the dough you still have out and shape them into spheres (You can also add any fillings you prefer). You can put these on squares of parchment paper, to make them easier to handle later. You should end up with about a dozen rolls, unless you feel like varying the sizes. Take out the other half of the dough and do the same thing. Then cover the rolls - a deep pan will do, as will a "tent" made out of plastic wrap and four tall glasses - and let them rise for another half hour (I just covered with clean towels).

4. Take the basket out of your steamer and bring the water to a boil, then reduce the heat to a simmer. Place some buns, still on their paper, in the basket, leaving an inch between them. Place the basket in the steamer, put a paper towel over the top, and put the lid on over that. (This will prevent condensation from dripping back down on the buns and creating blisters. I didnt cover mine). Steam them over simmering water for 15 minutes, or until they are firm. Take them out and serve

There you go, easy right? Just need a long time to prepare though but very-very nice steamed buns :) .

Monday, July 14, 2008

Chocolate Donut with mashed potato

Doesn't look very nice right, but taste delicious... with a little bit crunchy on the outside but soft in the inside... plus the chocolate taste!

Ingredients

· 1 egg
· 1/2 cup sugar
· 1 ounce unsweetened chocolate
· 1 tablespoon shortening
· 1/2 cup mashed potatoes
· 1/3 cup milk
· 1.75 cup sifted all purpose flour
· 3 teaspoons baking powder
· 1/2 teaspoon salt
· fat for deep frying

Method
1. Beat egg until light and beat in sugar.
2. Melt chocolate and shortening together, add to sugar mixture.
3. Add potatoes and milk.
4. Combine flour, baking powder and salt.
5. Add dry ingredients to batter, adding just enough to make a dough that can be handled.
6. Chill dough
7. Roll out dough on floured board; cut with doughnut cutter.
8. Fry (a couple at a time) until browned on both sides, turning once.
9. Transfer to paper towels or brown paper bags to drain.
.
*****
Note:
As usual I don't glaze my donuts. You can glaze them using the glazing method mentioned in the previous donut recipe. :)

Friday, July 11, 2008

Chicken Rice- My version


The very simple way of cooking and preparing Chicken Rice @ Nasi Ayam. Save money and cook your own Chicken Rice hehehehe....


Ingredients & Methods
**********************************
CHICKEN

Chicken portions
Oyster sauce
Concentrated chicken stock
Oil for frying

Method
1. Mix all the ingredients together and marinate for at least 1/2 hour.
2. Microwave marinated chicken until chicken is almost cooked.
3. Fry the chicken until dark brown colour.

**********************************

RICE

2 cups (rice cooker's measuring cup) rice, washed.
4 cups (rice cooker's measuring cup) water
2 tbs concentrated chicken stock
2 garlic, smashed
2 inches ginger, sliced
¼ onion ( small size), sliced

Method:
1. Mixed all ingredients in a rice cooker and cook the rice.

**********************************
CHILI SAUCE

Red chilies, seed removed.
Garlic, sliced
Lime juice or vinegar
salt
sugar
water

Method
1. Blend the chilies and garlic with a small amount of water (with a blender)
2. Heat up the chilies mixture in a pan until simmering.
3. Add in lime juice/vinegar, salt and sugar and let the mixture simmers until the sauce thickens.


That's all folk!. Just serve your rice and chicken in a plate with some sliced cucumber and pour in a little bit of the chili sauce on the chicken or you can serve the chili sauce separately in a small saucer.


Enjoy your Chicken Rice! :)

Monday, July 7, 2008

My Version of Warung Burger


Aha! I just remembered these photos when lab papa posted his warung burger in his blog.
I wanted so much to eat warung style burger last Friday but when I thought about the way they make burgers in the stall near my place, how small and overcooked the burger patties were... I just had to cook and prepare my own burgers....

So here they were... so nice and juicy and satisfying!

I grilled the burger patties instead of frying them.. so the patties were still juicy, yummy, yummy for our tummies hahahahaha


Kadus mama asked me to write down the recipe.... so here's for my blogger friend Kadus Mama :)
This is for one burger.. if you want to make more, then add the amount appropriately.


Ingredients

1 burger bun
2 burger "Ramly" patties
1 egg
cabbage - sliced thinly
Tomato chili sauce
Cheddar cheese slices
Mayonaise ( if like.. I dont :) )

Method
1. Grill the burger patties until they cooked (dont overcooked! )
2. Whisk / beat the egg and cook like a scrambled egg.
3. Cut the bun into two and spread some margarine or butter on the cut sides.
4. Brown the sides with margarine on a hot pan.
5. Arrange the ingredients on the warmed bun - cheese first, burger patty 1,tomato chili sauce, egg, some sliced cabbage, burger patty 2, chili sauce and then cheese. To have a delicious taste of cheese... make sure the patties are still hot :)

You can arrange them anyway you like actually......

Good luck!

Thursday, July 3, 2008

Express Donut a.k.a. Cake Donut


Hi there!

My daughter likes to eat donut but most of the time I don't have a lot of time to spare to cook donuts for her as you probably know the original donuts normally take hours to prepare as it uses yeast. I didn't glaze the donuts I made because I don't like them to be too sweet, even without the glaze (that's why they don't look shiny), the donuts taste sweet enough for me.

I found this recipe to cook donut in much shorter time and the most important thing for me is my daughter loves them very-very much! The donuts are soft but please don't compare them with the Big Apple or Dunkin Donuts etc., this is an express donut recipe.. remember? :)


Work plan


60 mins preparation
30 mins frying


Ingredients
1/2 cup sugar
1 egg, beaten
1.5 Tsb shortening at room temperature
2 cups of sifted flour
2 tbsp baking powder
1/4 tsp salt
1/2 cup milk
oil ( for frying)


Glaze
1/4 cup boiling water or 1/4 cup hot coffee
pinch of salt
1 cup icing sugar


Method


1. In a medium bowl, slightly beat 1 egg.
2. add sugar to egg and beat until incorporated
3. Add butter and beat until smooth
4. Add milk and mix well.
5. Add flour, baking powder and salt. Mixed well.
6. Cover and chill dough until stiff enough to roll out with rolling pin.
7. Roll out dough on a floured surface with rolling pin to 1/3" thick. Let rise for 5-10min.
8. Cut out donuts with a donut cutter.
9. Combine the ingredients for glaze and set aside.
10. Fry donuts until golden brown.
11. Glaze the fried donut with the sugar mixture and cool on a wire racks.


Tips:


Add more flour, If your dough is not stiff enough to roll out with a rolling pin.


You can use a clean smooth bottle ( or others) instead, if you don't have a rolling pin.


If you don't have a donut cutter, you can just make a ball of dough, flatten it a bit and make a hole in the middle it or you can also use rims of drinking glasses or bottle covers ( different sizes of course, big one to cut the shape and small one to make a hole in the middle).


This is the donut cutter I use. A cheap plastic one which you can buy from the supermarket for RM1.90. This makes mini donuts. For bigger donuts, you can buy a bigger mould which costs about RM2.50.


Monday, June 16, 2008

Homemade Burger

Especially for those overseas and it is quite difficult to find halal burger. Here is a simple homemade burger. I have not tried this recipe, but sound easy enough to do. I didn't put any measurements in the ingredients section because you can estimate the quantity yourself according to your own liking or taste. For example some might like a lot of onion but some might prefer just a little of it.


Ingredient
Lean meat ( can use any type) or chicken
Onion
Salt & Pepper
Sesame Oil
Corn starch
Flour
Burger Bun
Cucumber
Tomato
Cheese
Chili / Tomato Sauce


Methods

1. Mince lean meat
2. Chop onion into very small pieces
3. Add sesame oil, salt and pepper. Mix well.
4. Add corn starch to the meat and press it all together until it forms a ball.
5. Then make it into a disc shape (like normal burger patty)
6. Cover the patty with corn starch mixed with flour
7. Fry (or grill) burger patty till cooked.
8. Slice cucumber and tomato and onto a burger bun together with the patty and cheese.
9. Add chili / tomato sauce if you like.

Variations
You can replace meat burger with egg (bull's eye) or wrap the burger patty with the egg.
You can also use other vegetables (e.g. salad leaf) according to your own preference.

Saturday, June 14, 2008

Basic Macaroni and Cheese

Especially for Kadus_mama. This is just a very basic and easy to do Mac & Cheese recipe. Hope you will like it :).

Ingredients
1 cup macaroni
2 tbsp butter
1 tbsp flour
salt and pepper to taste
1.5 cup milk
2 cups grated Cheddar cheese
1 small onion ( if like)

Method

  1. Bring a large pot of lightly salted water to a boil. Add macaroni and cook for 8 to 10 minutes. Drain.
  2. While the pasta is cooking, melt 2 tablespoons butter in a saucepan over medium heat. Stir in the minced onion (if use) and cook until the onion softens and turns translucent, about 5 minutes.
  3. Stir in the flour, pepper and salt until incorporated, then pour in the milk (gradually while stirring) and bring to a simmer.
  4. Simmer, stirring constantly until the milk has thickened, about 10 minutes.
  5. Take the milk mixture off of the heat and stir in the Cheddar cheese until melted.
    Pour cheese sauce over the macaroni.
    Serve warm.

Variations
Add boiled / steamed vegetables like carrots, broccoli, cauliflower if like.
Can also add more cheese on top of the macaroni and cheese sauce and baked for 15-20min in a preheated oven (175C).

Friday, June 13, 2008

Banana Cake

Yesterday I made some Banana Pancake.. today I baked Banana Cake... because I have some more bananas and I have been wanting to try baking Banana Cake for quite a while but never got the chance.

Here is a recipe that I tried...

The cake is very nice, soft and strong banana flavour. I made this banana cake in a rush... so end product did not look so nice... hehehe
but still taste very nice.


Ingredients
8 bananas (pureed)
1 1/2 cup flour
1 cup caster sugar
3 eggs
1/2 cup oil
2 tsp bicarbonate soda
2 tsp baking powder
1tsp banana essence

Method

  1. Beat sugar and egg together
  2. Mix in oil, banana essence and pureed bananas.
  3. Add in flour, bicarbonate soda and baking powder ( sieved together) and mix well
  4. Bake at 180C for 1 hour

Tip
Mashed / pureed the banana well to get a nice texture cake. For the cake I showed in the picture above, the bananas were not mashed well, so the cake texture was quite rough. In my next trial, I am thinking of modifying the recipe a little bit.. I'll post the result if it turned out to be ok :).

If you don't have an oven, you can also steam the cake mixture for 45min. The cake would be softer and very moist compared to baked cake.

Friday, June 6, 2008

Basic Bun recipe

Yes, you are right! Another simple recipe that I have tried.. you can use this recipe and replace the fillings with your favourites or just bake it without any filling.

Basic Bun Recipe

Ingredients:

A
250g flour
1/2 cup caster sugar
1/2 cup powder milk
(Mix ingredient A together)

B
4 teaspoon salt
1/2 packet yeast maripan
1/2 tablespoon spry [crisco]..melted [can be replaced with butter or margarine)
1 egg (beaten)
1 tablespoon cooking oil
125 ml warm water

Method
1. Mix all the dry ingredients together in a big mixing bowl.
2. Put in all the wet ingredients and mix well.
3. Knead dough until smooth
4. Cover dough with damp towel and leave until doubled the size
5. Turn out, punch and knead lightly
6. Divide dough into several small balls and flatten.
7. Fill in the fillings or just leave them empty
8. Roll into balls and leave them to rise again.
9. Bake at 200C selama 15 min (can also be fried until golden yellow)
10. Before baking, brush the egg and milk mix on top of buns to give nice brown colour to the bun
11. When buns are cooked, glaze with butter.

I told ya..... the recipe is so simple.... and the buns turned out nice... ( I am not a professional baker, so I am so happy when they turned out nice, hahahaha)

Thursday, June 5, 2008

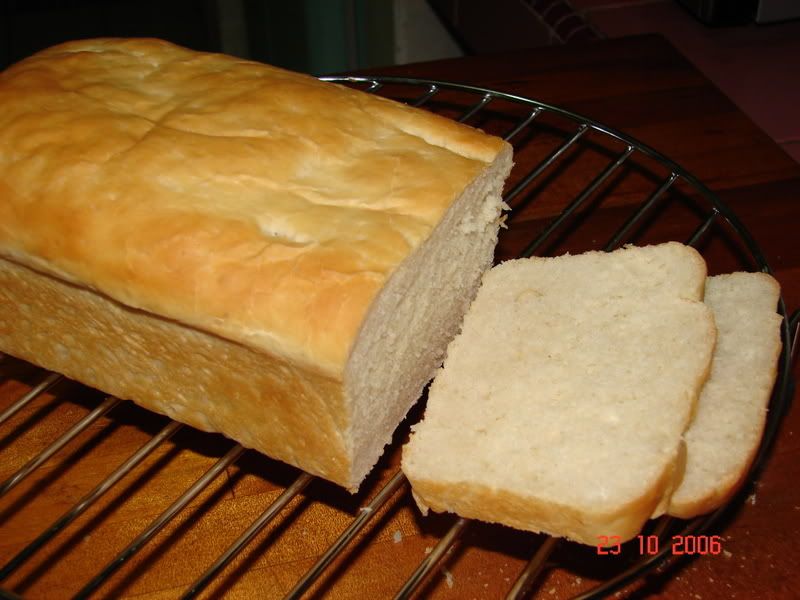
Basic White Bread

I tried this recipe because it looked so simple. Yup, it is simple but take sometime to get the end product, but worth it. My family loved it.

Basic White Bread


Ingredients:


3 cups of flour
1/2 tablespoon sugar
1.25teaspoon salt
1/2 packet dried yeast
1 cup of warm water(~ 48°C)
1 tablespoon butter (melted)


Preparation


1.In a large mixing bowl combine 1 cup flour, sugar, salt, and yeast. Beating at low speed, add the water and butter. Continue beating at high speed for 3 minutes. Add 1/4 cup flour and beat 4 minutes longer.

2. Put in 1 cup flour, or enough to make a soft dough. Turn out onto a lightly floured surface.

3. Knead for about 8 to 10 minutes,, or until dough is smooth and elastic, adding a little more flour as necessary.

4.Place dough in a large buttered bowl, turning to butter top. Cover with a clean towel and let rise for about 1 hour in a
warm place, free of drafts.

5. Punch dough down; knead until smooth. cover with the mixing bowl, and let stand for 15 minutes longer. Roll into a 12x9-inch rectangle. Starting with the narrow edge, roll up, turning ends under to make loaf to fit pan.

6. Place roll seam side down in greased loaf pan, 9x5x3-inches. Cover pan with clean towel and let rise in warm place until double, about 45 minutes.

7. Bake loaf at 200°C for 25 to 30 minutes, or until loaf sounds hollow when tapped with fingers.

8. Remove from pans to racks; brush with butter for a soft, more flavourful crust, if desired